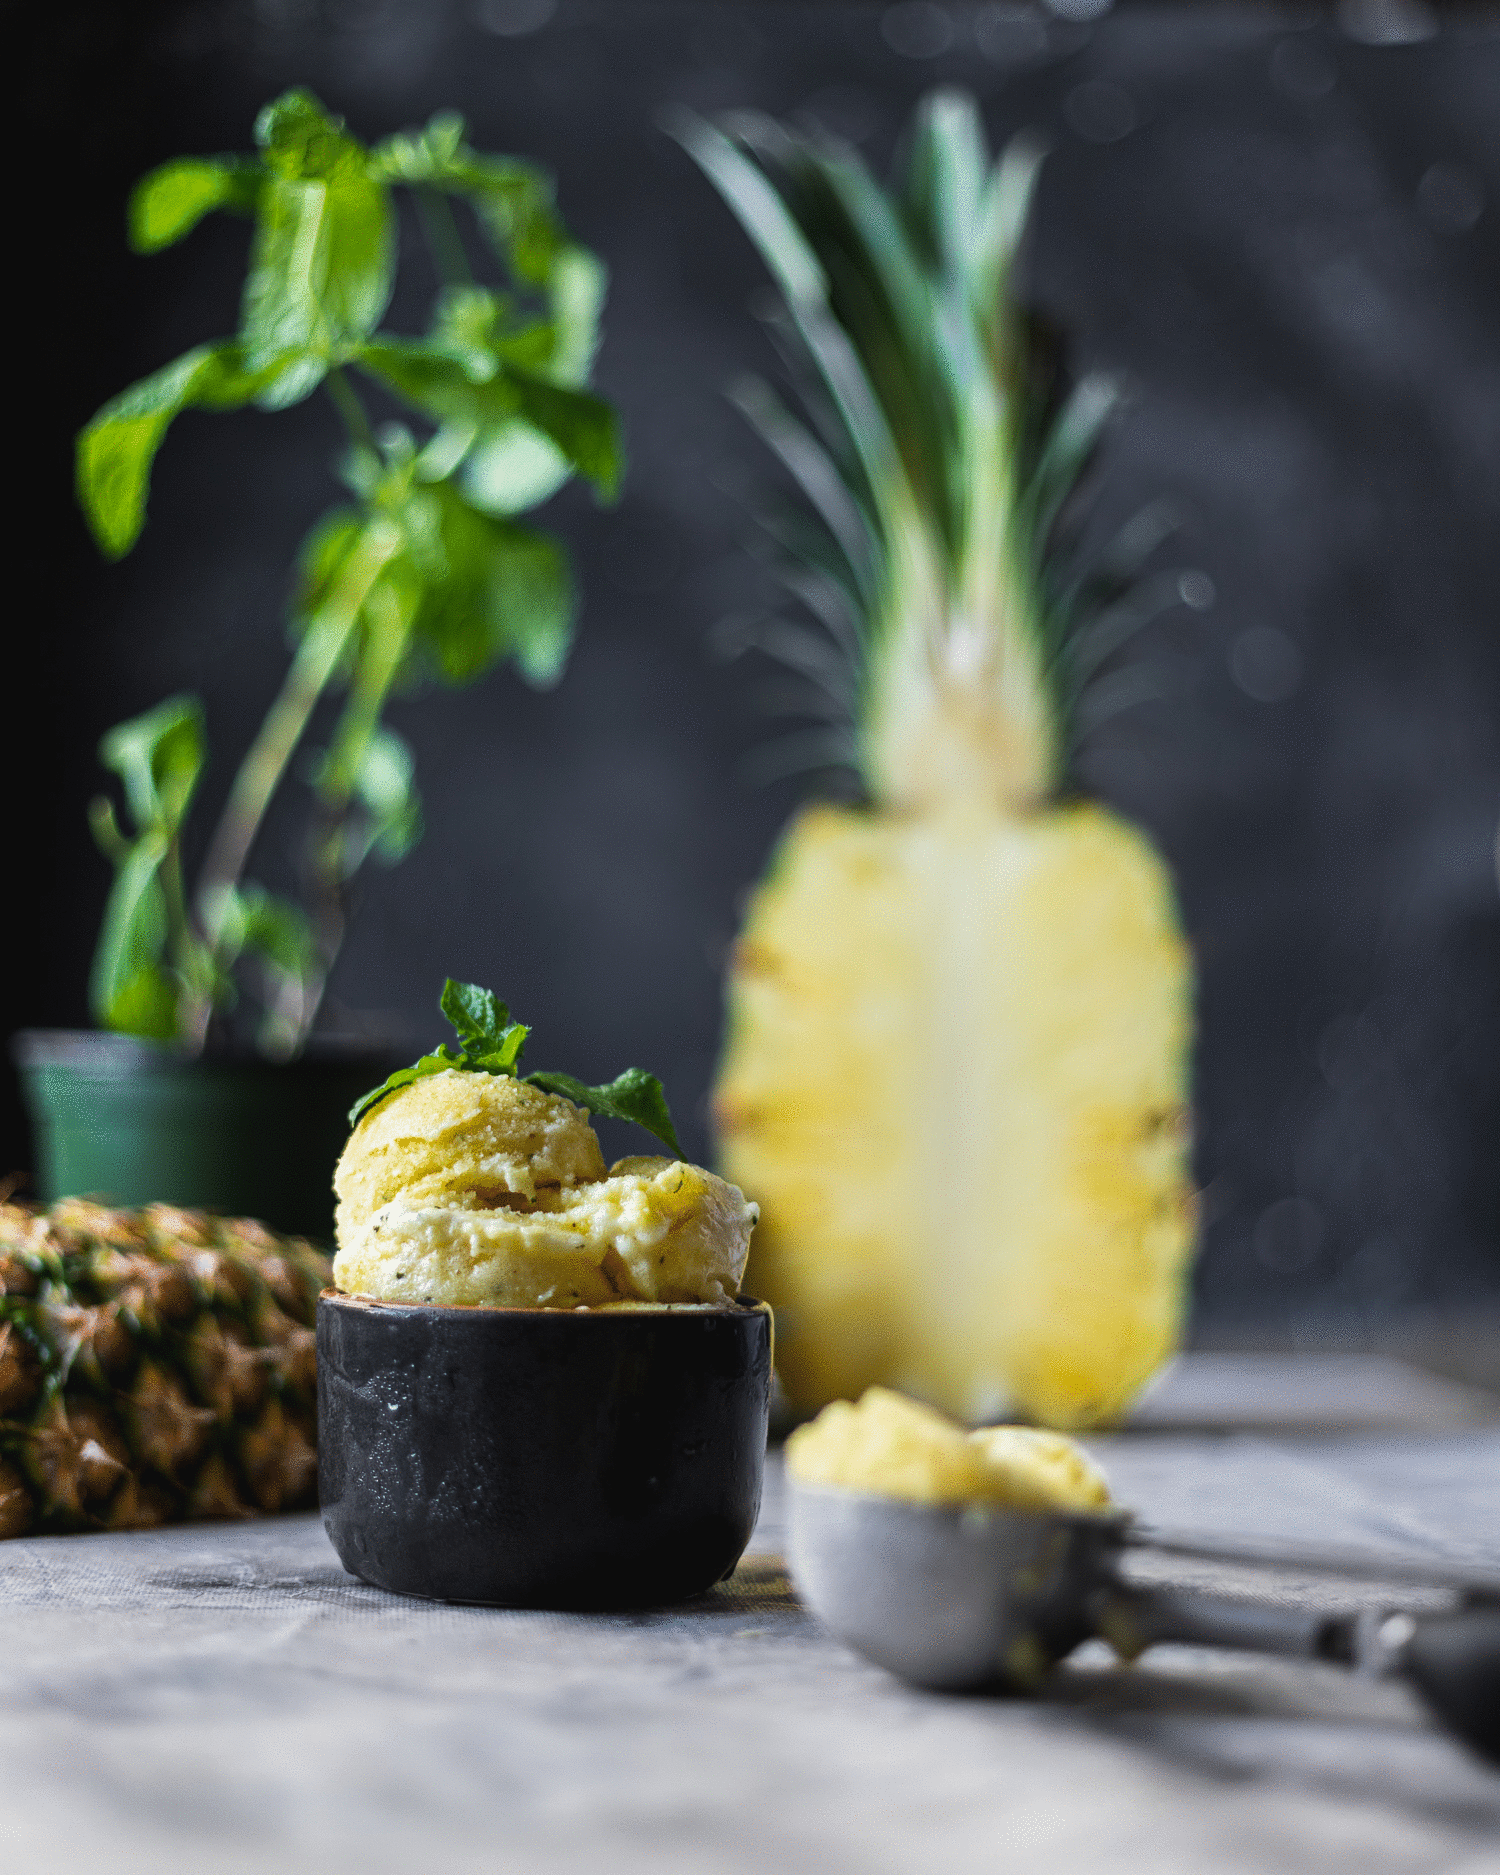
Pear and Cider Sorbet
This rich and creamy sorbet blends ripe pears with tart apple cider to create a smooth, scoopable dessert without any dairy. It’s perfect for any fall or winter meal as a palate cleanser or light dessert. Be sure to read through the guide, How To Make Sorbet, for all the tips and tricks you need to know to make the best sorbet at home.

Sorbet isn’t just for summer…
I believe in using the best seasonal fruits in my kitchen, and preserving some in the form of delicious sorbet is definitely one of my favorite applications. You’ve seen my love for pears in my Cardamom Spiced Pear & Cranberry Crisp and the popular Pear & Almond Olive Oil Cake, but today we’re skipping the oven and going straight for fresh fruit, spun in an ice cream maker until velvety and rich.
If you’ve followed this blog for any length of time, you know that I love the “Frozen Treats” dessert category with a particular fervor. There’s something about a cold, creamy concoction that just makes my day, no matter the temperature outside. Sorbet is no exception, with its ability to pack an ultra flavorful fruity punch in a relatively simple-to-prepare base. Unlike ice cream, sorbet contains no dairy and no eggs—no fat whatsoever, in fact—and so it relies on other factors for the best texture.
Even without the “insurance” of fat from dairy and eggs, you can make a smooth, creamy texture, as detailed in this guide. I highly recommend you check it out if you’re new to sorbet making, as it contains the science you need to know in order to master your homemade sorbet.
Sugar is your friend, use it wisely.
Just in case you don’t read the full sorbet guide (please do, I promise it’s useful!), I want you to know one thing: sugar concentration is the most important factor for getting smooth, creamy, and scoopable sorbet. Too little sugar and your base will churn up and freeze to be dense, icy, hard as a rock, and not super pleasant to eat. Too much sugar, and you end up with a slushy that refuses to freeze completely, rendering formless scoops that melt quickly. In order to gauge the sugar concentration in a home kitchen without fancy tools, I detail how to perform the “egg test” in the recipe below to make sure you’re in that ideal range of 20-30% sugar concentration. If you want to get fancy, you can buy a refractometer, but I don’t have one of those and I’ve done just fine without.
Counteract sweetness with acidity
To balance out the sugar concentration needed to achieve the perfect texture for sorbet, we need to add some acidity. Pears are not a very acidic fruit on their own, so the tartness that apple cider provides not only rounds out the flavor, but thins out the very thick pear puree for a smoother base. I like to add some lemon juice, too, because I tend to gravitate towards tart things, but feel free to taste the base after blending the pears, cider, sugar, honey, and salt, and add lemon to taste.
I also love to dress this sorbet up with some crystalized ginger “sprinkles” which are just finely diced pieces. It adds a lovely chew, spice, and sweetness that I find irresistable!
No ice cream maker?
As explained in the full guide, sorbet by definition is a churned product. Churning (or spinning) sorbet not only freezes it; the constant motion incorporates air into the mixture as it freezes, contributing to that final texture. If you don’t have one, you can make granita as described in the instructions in the “note” section of the recipe below.

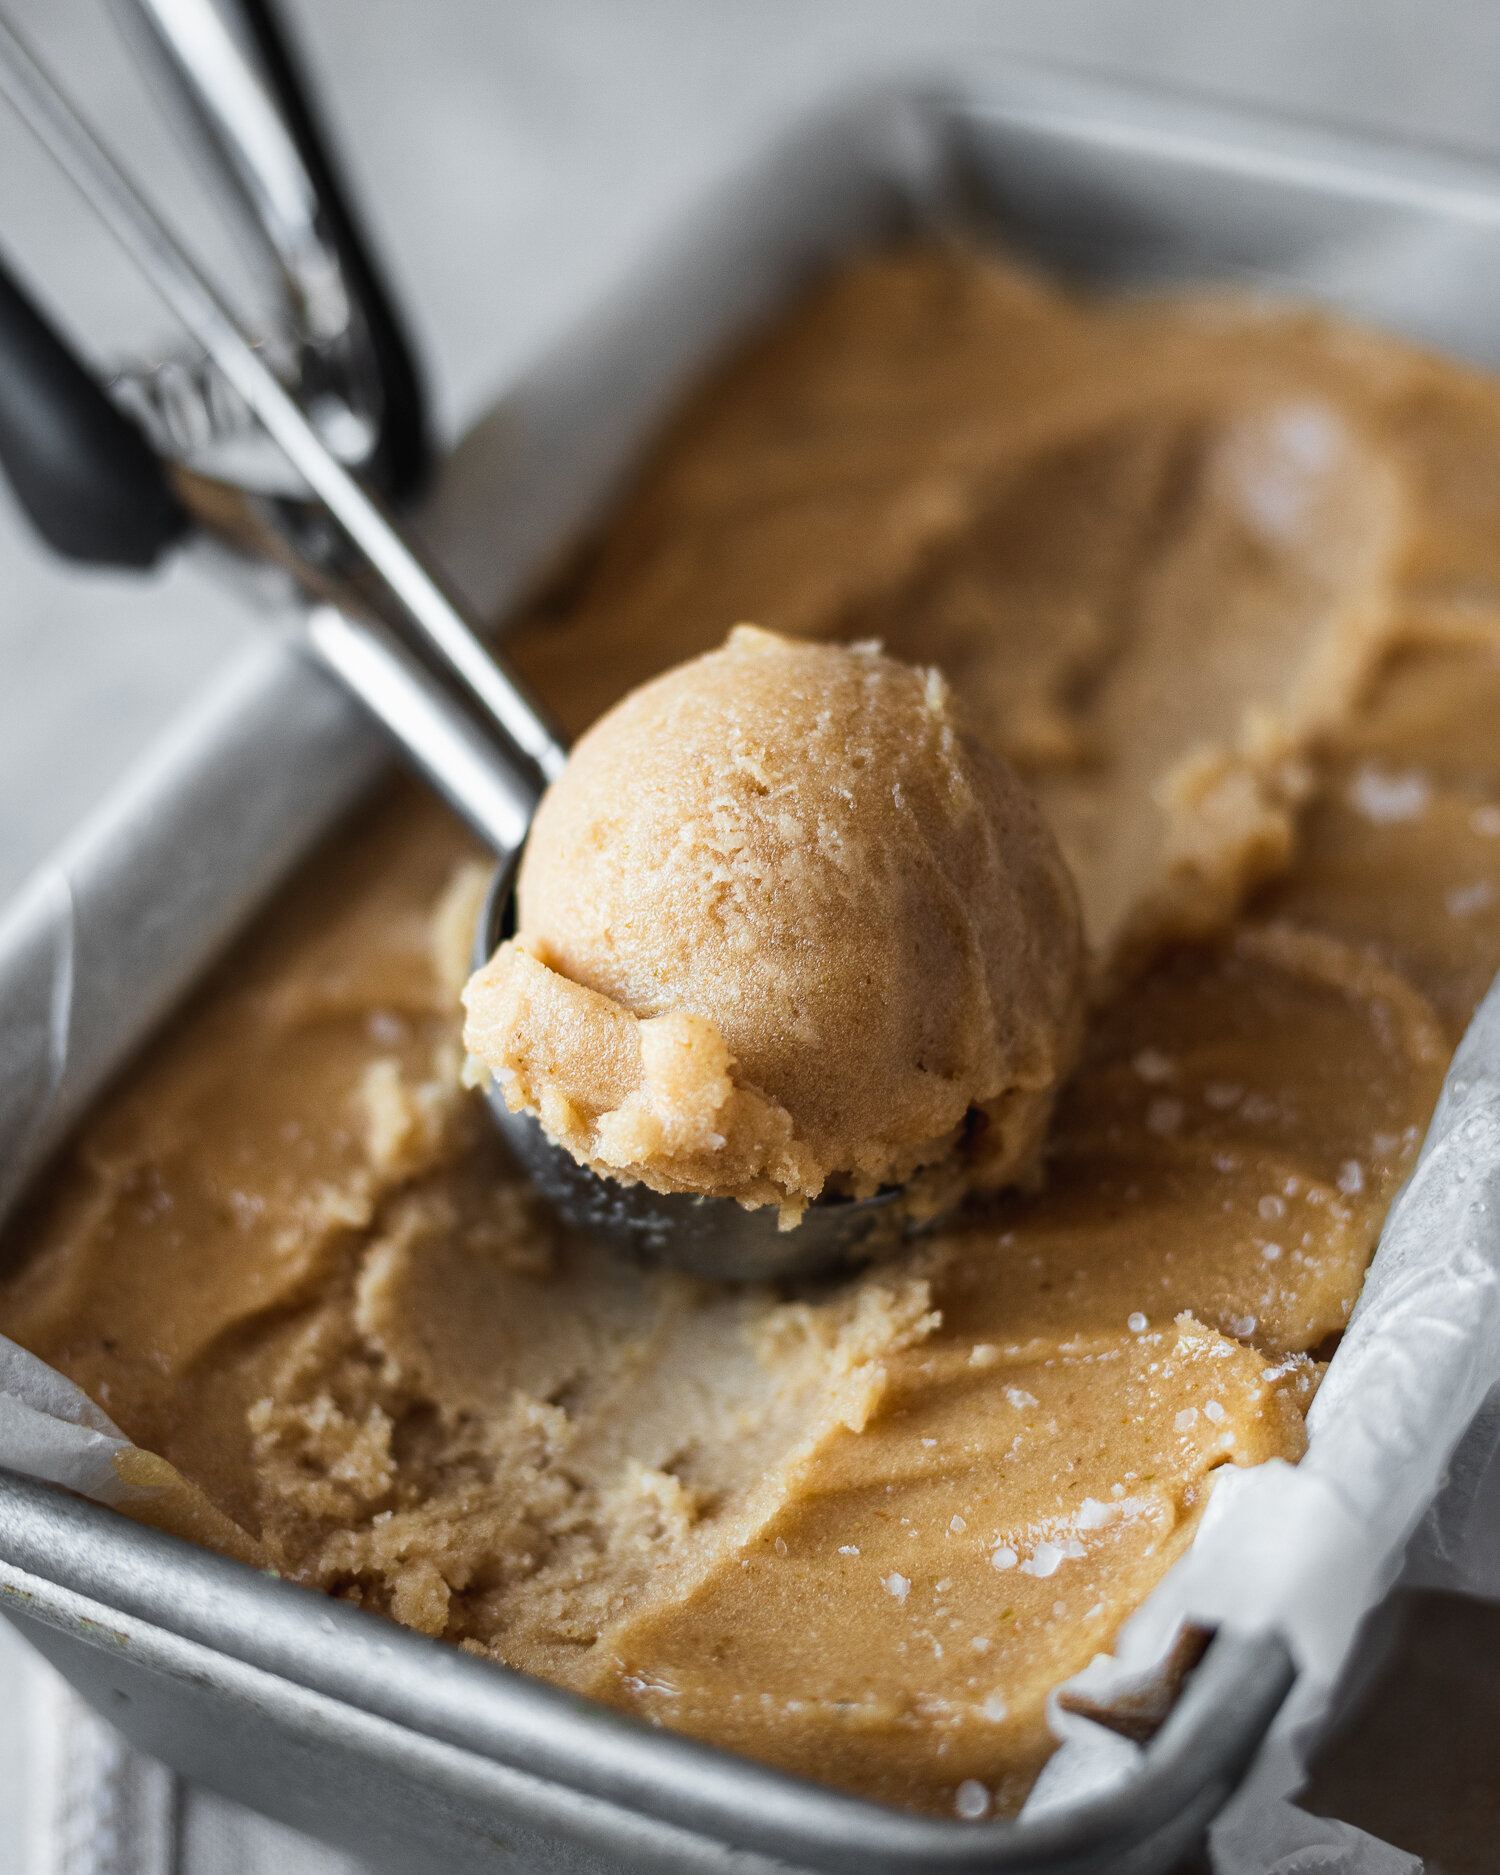
Pear and Apple Cider Sorbet
Ingredients
- 4 large (712 grams approx) ripe pears
- 1 cup (248 grams) apple cider
- 1/4 cup (85 grams) honey
- 1/2 cup to 3/4 cup (100 grams - 150 grams) sugar
- 2 tablespoons (30 grams) lemon juice
- 1/2 teaspoon to 1 teaspoon kosher salt (or more to taste)
- Diced crystalized ginger, for garnish
Instructions
- 24 hours before you want to make sorbet, put the bowl of your ice cream maker in the freezer if needed.
- Peel the pears, if desired. Remove the cores and cut pears into 1/2 inch cubes.
- Blend the chopped pears, apple cider, honey, and 1/2 cup sugar together (reserve remaining sugar for step 4) with an immersion blender, in a blender, or with a food processor until smooth. Strain puree if desired.
- Perform the egg test: wash and thoroughly dry an egg. Place the whole egg in the shell in the prepared sorbet base. If it floats, leaving about a quarter-sized portion visible, the sugar concentration is correct. If it sinks, add remaining sugar. If it floats more than described, add a bit more liquid (cider, or more fruit puree ).
- Stir in lemon juice and salt. Taste, and add more salt or lemon if needed for flavor.
- Chill thoroughly, at least 2 hours but preferably overnight before churning in your ice cream maker. Sorbet base should be 40°F before churning.
- Churn according to your ice cream maker’s instructions, or follow the granita instructions in the note below.
- Transfer sorbet to an airtight container and freeze for at least 2 hours before serving. Garnish with diced crystalized ginger if desired. Eat within 2 weeks for maximum freshness.
Notes:
Remember, sorbet base will taste more flavorful at room temperature when mixed than after it is frozen, so always err on the side of adding a bit more salt and lemon than you think you need to really enhance the flavor before churning.
To make granita:
- Pour this base into a shallow baking dish such as a 9x13” pan, then place in the freezer, covered well.
- Set a timer for 30 minutes. After 30 minutes, use a fork to scrape up any ice crystals that have started to form in your pan, then set back in the freezer.
- Repeat this 30-minute rest and scrape process 5-6 times over the next few hours, so that you are constantly disrupting the ice crystal formation. This is the key to forming small ice crystals versus big, sharp chunks.
- When granita is completely frozen through, use a fork to scrape the surface one more time, then serve. Granita will have an icier texture because there’s not nearly as much air incorporated into the base and the way that ice crystals form is different than sorbet, but it is still a delicious summer treat!